Science, Delicious Science

My youngest son, Kellen, is on a Cars kick.  We run races every day, pretending we are Lightning McQueen and The King.  We read Cars books.  We listen to the soundtrack.  We play with the toys.  We live Cars.

Kellen asked if he could have a drink that was colored like The King.  It reminded me of a density experiment from Dad’s Book of Awesome Science Experiments by Mike Adamick.

http://mikeadamick.com/

The experiment is titled “Rainbow Water Stacks” and Adamick shows it three different ways, one of which is a red, blue, and clear layered drink- perfect for both Lightning McQueen and King fans.

Before we moved on to the delicious part, we did a more traditional rainbow stack.  You’ve probably seen these a hundred different ways.  The key is to pour each layer SLOWLY and layer the liquids according to density.  If you need help explaining density (I did) and ideas for liquids and the order to stack them in, check out this post from Steve Spangler (of course).

http://www.mykidsadventures.com/how-to-stack-liquids/

We opted to stack corn syrup, dish soap, water, rubbing alcohol and vegetable oil.

P1220854

P1220858

A turkey baster was suggested to help pour the liquids, but I didn’t have one.  We put our ingredients in squeeze bottles.  I advised Kellen to squeeze the liquids SLOWLY and against the side of the glass, but Kellen is not quite there as far as impulse control.  A few of our colors got a bit mixed together, but we were able to create levels and display the property of density.

The part Kellen liked the best was dropping things into the completed stack to see where they would end up- some floated on top, some fell to the bottom, others got trapped in the middle.

P1220864 P1220867

All that science built up a thirst.  Time to make drinks!

We talked some more about density as we prepared our beverages.  We filled glasses with lots of ice- this helps slow the liquids down.  We put cranberry juice cocktail on the bottom, blue Gatorade in the middle, and sparkling water on the top (although the sparkling water sort of blended with the Gatorade).

P1220871

It was time to taste our Cars themed concoction, and boy, was it a hit!

P1220874

It’s still hot here in Arizona.  Cool off with some science.  Happy experimenting!

Balancing Your Chi- An Experiment in Weight, Lego Style

Liam’s current obsession in Lego Chima.  Over the past few weeks, I have become well-versed in the adventures of Laval and Cragger.  I can name all the tribes.  I understand that the Chi, the powerful element that fuels the land of Chima, must be equally balanced among all the tribes or there will be catastrophic consequences (earthquakes, floods, Donald Trump will become president).

The kids were off from school for Labor Day this past weekend, which meant we had a lot of time to fill.  I turned to another trusty book of science experiments to find an activity to pass some of the morning.  An experiment in balancing weight, courtesy of Dad’s Book of Awesome Science Experiments by Mike Adamick seemed like a perfect opportunity to capitalize on this love of Chima.

Dad’s Books of Awesome Science Experiments

The experiment is very easy.  It requires a pencil, a ruler, tape, and a few items of equal weight to balance.  In Adamick’s version, he used pennies.  We used Lego pieces that are supposed to be Chi.

The first step is to tape the ruler down to keep it from moving.  Next, balance the ruler on top of the pencil so that it is perpendicular.  It will take a few attempts to find the exact spot.

Then begin adding weight to each side.  You can ask a thinking question such as “I placed a piece of Chi on the number 2 on this side of the ruler.  What number would I need to place a piece on the other side to create balance?”

P1220759

Once you have the basic experiment done, you can begin to play with other options.  How many pennies would equal the weight of a piece of Chi?  Would a paint stir stick provide the same results as the ruler?  Why is it more difficult to do the experiment with a popsicle stick than a ruler?

P1220761

I was REALLY surprised at how long the boys played with this one.  I thought after they balanced it once, the experiment would be old news.  But they kept doing it over and over.  Liam created one side of the ruler for the lion tribe, and another side for the crocodiles, and when it would get out of balance would exclaim “The lions need more Chi! The crocs have too much!”

Think of what your little one is into, and see if you can adapt this activity to interest them.  Happy experimenting!


Reviving Ideas for the Second Child

Oh, the plight of the second child.  You never get to do anything first.

As much as parents try to treat siblings equally, sometimes the second child can feel like his interests are second fiddle.  If you are like me, you find it is easiest to focus on an activity the whole family can enjoy.  But that means the littlest one might miss out on some of the fun.  In our mind, we have already done the craft or activity, since we completed it with the older sibling.  We forget to complete it a second time around once the younger sibling is of age.

My oldest son, Liam, had a fascination with the movie Cars when he was around three or four years old.  We had a collection of the Cars gang- multiple ones actually, because if we lost Lightning McQueen there would be no rest in our house until we found him.  But Cars gave way to Ninja Turtles, and super heroes, and Legos.  I pretty much forgot all about Lightning and Mater.  Until this past summer.

We stayed at a VRBO in Wyoming on a vacation.  We decided to have a family movie night, and came across a dvd of Cars.  We popped it in and a new fan was born- Kellen.  He may have watched the movie before, but he was too young to remember it.  The film was all new for him.  Once again, it was Lightning McQueen mania at our house.  After assembling another collection of the gang, we began to dream up ways to put cars into all of our activities.  I was reminded of a few activities I did with Liam, that could be reborn with a Cars twist.

P1220212

I cut out some simple shapes, and asked Kellen to make pictures with them.  Sure enough, he made cars.  I did this activity with Liam a couple of years ago.  Liam made pictures of Ninja Turtles brandishing swords.  Kellen makes cars racing along a track.  The pictures look simple, but the stories are elaborate.  You may not realize it, but the small yellow car on the right of the top picture won the race by spinning around and driving backwards! Get ready to hear some tall tales when you start this craft.

P1220210

Liam and I used to cut pieces of paper to make paths to connect various superhero lairs.  Kellen used the same idea to make long racing tracks.  I simply cut some pieces and gave him a roll of scotch tape.

P1220215

He even got some writing practice in by making start/finish line signs.

P1220216

Revive those old ideas and give them a new twist.  Instead of playing second fiddle, your youngest will feel like first chair.

Saturday Morning Science

A leisurely breakfast and a cool experiment.  Sounds like a pretty great Saturday morning if you ask me.  Thanks to the folks over at tinkerlab we were able to have both.

http://tinkerlab.com/experiment-egg-geodes/

P1220599

I love the ease of this experiment. Don’t let the presentation photo fool you- It’s really just measuring and mixing. All items used I had on hand. I also felt like we got a big payoff.  We were able to watch the geodes grow over a few days, and then end results were gorgeous.

First step is to use a knife to knock the very top off the egg shells.  The number of eggs depends on how many solutions you are going to try.  Each solution will fill two eggs.  Empty the yolks into a bowl and mix up your favorite omelette (that’s where the breakfast comes in).  Rinse out the egg shells and peel the membrane from the inside.

You can look at the full experiment on the link at the start of this post, but we basically mixed a 1/4 each of the following materials with a 1/2 cup of very warm water.

Kosher Salt

Epsom Salt

Borax (pay attention when kids are handling borax.  You do not want this ingested)

Sugar (we did not get sugar crystals to grow)

They also recommended trying sea salt, cream of tartar, or baking soda.  Add food coloring or liquid water colors so that each solution is a different color.  Make a sheet to track the color of each solution.

P1220626

The boys were not very patient about getting each substance to dissolve in the water.  We had undissolved salt and sugar in the bottoms of our eggs.  This did not seem to impede growth.

The geodes will start to grow in 1-2days as the liquid evaporates.  We dumped the remaining liquid out after about four days so we could examine our crystals.  I’m sure you could let them keep going until all liquid evaporated.

This is the basic experiment.  There are many ways to extend learning.

One thing we did was to examine the materials beforehand, so we could see if the crystals that grew were similar to the original shape of the substance.  For instance, the Borax looked like small flakes, and the crystals it grew looked a bit like snowflakes.  We tracked this on our sheet by drawing pictures of what each substance looked like prior to mixing with water.

P1220728

We also looked through a microscope to see what our substances looked like up close.  The addition of a microscope need not be expensive or complex.  We purchased a simple microscope at the thrift store for around $6.  So far, it has been sufficient for experiments, and adds a fun dimension.

P1220601

This can also be a great opportunity to build vocabulary.  Explain what a solution is as you mix the ingredients.  Ask them what their hypothesis is.  Talk about what results were yielded. Define crystallization.  If you have crystals that grow on the outside of the shell, talk about osmosis.

The best part is that if all goes according to plan, in a couple of days you will have amazing crystals like these! Happy experimenting!

P1220701 P1220690 P1220679 P1220676

Go Take a Hike- 8 Tips for Raising Outdoor Adventurers

I think when many parents think of hiking with their children, they imagine a seemingly never ending drudge as children stop every ten feet to complain of needing to be carried and repeatedly ask “Are we done yet?”

A couple of weeks ago, Kellen inquired as to when we could go for a walk in the desert.  I got to wondering why he loves to go for walks now, when he started out as one of those “when will this be over” kids.  Over many hikes, I’ve picked up a few tips to making the trails more fun for kids, which of course makes it more enjoyable for everyone.  Here are eight tips to get your little one loving the outdoors and ready for adventure.

  1.  Have a scavenger hunt.  Create a simple list of ten or so items that can be found on a hiking trail.  Some of our favorites are triangle or heart-shaped rocks, a stick in the shape of a Y, a bug, a small leaf, a trail sign, and a map.  You could also do a five senses hunt- the sound of a bird, touch a smooth rock, sip from a water fountain at a trail head.  If your child can’t read yet, you can draw simple figures or use an image shirt to create a list of pictures.  Of course, it is more fun if you have a prize for when the list is completed- a small magnifying glass is a great one, but my boys love lollipops too.

Kellen completing his list.

2.  Assign jobs.  I have two boys.  When we hike, one is the trail leader.  The other is the trip photographer.  You could have someone in charge of the snacks and water.  Perhaps a navigator that looks for maps and signs.  Kids love having specific jobs that make them feel integral to the adventure.

Photos by Liam, our trip photographer

3. Think of cool trail names and destinations.  We frequently walk a trail titled “Desert Classic.”  But my boys know it as the trail to the Cookie Rocks.  One day, I said “Look at those rocks.  They look like huge chocolate cookies.  Let’s call them the Cookie Rocks.”  The name stuck and now when I ask if they want to hike, they’ll often respond “Can we go to the Cookie Rocks?”  Fun names make things, you guessed it, more FUN!

Sitting on the Cookie Rocks with Liam

4. Create a hiking journal- Kids are going to want to pick up treasures along the way.  Interesting rocks and sticks, pieces of glass, small parts of a bike- they all make their way into their pockets.  We tape or glue them into a journal along with a small note of the date, where we were hiking, and who we were with.  The boys are always wanting to create a new page.

journals

5. Treat their treasures like treasures.  Along the same lines as the hiking journal, we create special jars to showcase their found items.  I know for parents it can seem like “great, you found yet another rock.”  But these items are important to your kids.  Making memory jars is a beautiful way to save those memories without finding rocks and sticks on every counter top.

P1210997

Treasure jars with feathers, rocks, bones, sticks, and more.

P1220006

A favorite treasure jar, containing items from hikes, vacations, and other adventures

6. Bring out your gadgets.  Kids love playing with a compass or looking through binoculars.  Just when they start to get bored, take a break and have fun making something far away look up close.

Taking turns with binoculars on a group hike

7.  Prepare for frequent stops.  A one mile hike with a preschooler can take an hour.  The goal is not to go far or fast- simply enjoy being together and get them comfortable with the idea that hiking is a fun activity.  We take a lot of snack breaks, stop to sit on many rocks, and spend a lot of time stopped on the trail writing our names in the sand.

8.  Turn around before they get tired. Hopefully with all these fun activities, your kids are going to fall in love with hiking.  But their little bodies are still getting used to the activity.  Be cautious as they cry “We want to go further!”  They want to keep seeing and doing more and might not be prepared for getting back.  Better to start slow and figure out where that threshold is.

Of course, always wear sunscreen and hats, take a simple first aid kit, and plenty of water.  Happy hiking!

The Egg and Nothing But the Egg- An Experiment in Slippery Fun

A few months ago, I purchased a book titled Tinkerlab: A Hands-On Guide for Little Inventors by Rachelle Doorley.

tinkerlab

I like to have a few of these type of books around for the days when we need something to do and I’m out of ideas.  Last week, Kellen and I were having such an afternoon.  Kellen is a big fan of experiments, so I quickly located an easy experiment for us to complete from the Tinkerlab book called the “Naked Egg” experiment.

The photos and description in the book did not do the experiment justice.  Perhaps because they used yellow food coloring, the egg, to me, simply looked like a hardboiled egg.  The text described playing with a slippery egg, and I again thought “how much fun is playing with a hardboiled egg?”  But we had all the ingredients, so I thought we’d give it a try.

The first step was to gently place an egg into a jar or container.

P1210963

Step two was to pour enough vinegar to completely cover the egg.  I didn’t tell Kellen it was vinegar.  Before pouring, I asked Kellen what he thought we were going to pour on the egg, and he said water.  I replied that it looked like water, but it wasn’t, and asked him how he might determine it was something else.  He smelled it and replied “it’s vinegar!”  This is a simple experiment, but can become more complex by asking questions that get your little one thinking.

P1210965

We added some liquid watercolor to the vinegar.  You can also use food coloring. At this point, I asked Kellen what he thought was going to happen as we let the egg soak over night.  He replied “it’s going to turn red.”

P1210968

Kellen observed that the egg was covered with bubbles.

P1210976 P1210977

After a few minutes, a ring of foam started to appear on the surface of the vinegar.

P1210980

We left the egg over night, swishing it around every few hours to ensure the entire egg spent some time in the vinegar.

The next day, we took the egg out of the jar, and placed it in a glass dish to play with.  We were surprised to learn the shell had completely disappeared- a naked egg!  The shell is calcium carbonate and dissolves as a base when mixed with an acid, vinegar.  That’s where all the bubbles came from! Kellen loved the color and texture, and was thrilled to learn the egg could be GENTLY bounced.

P1220179

The egg felt VERY rubbery.  We couldn’t figure out if it was solidified only on the outside, or all the way through the egg.  We took the egg outside and held it up to the sun.  We also shined a flashlight underneath it.

P1220184 P1220189

We soon learned the egg was NOT solid all the way through.  Liam dropped the egg a little less gently, and the egg burst. Good thing we had that dish underneath it.

P1220194

The outside of the egg solidified into a membrane similar to the texture of a deflated balloon.  Inside the egg was just the same as if you cracked a raw egg.

P1220195

The book advised to try the experiment again with different solutions- corn syrup, salt water, etc.  We can’t wait to give it another go!

Let the Paint Fly- Giving Over to Method not Results

It’s not the destination, it’s the journey.  If you google something along these lines, you will be met with multitudes of inspirational quotes by everyone from Maya Angelou to Drake.  Yesterday, I received a personal reminder of the power of this phrase.

My friend, Lala, had jury duty and needed a sitter for her four year old son, Alex.  Lala had just done me the awesome favor of watching my cats for an entire month.  How could I say no?  I wouldn’t anyway because I adore her son.

Alex is one of those children who is so full of energy and ideas.  You have to keep your eye on him every second or you’ll find him lining up chairs to climb from the table to the counter and beyond.  I used to joke with his mom that I wouldn’t recognize him if he didn’t have some sort of cut or bruise.  He’s just in a constant state of exploration, with no desire to heed caution.

As a parent, I’m sure this can be exhausting, but as his babysitter, it’s a lot of fun.  I’m always curious to see where his mind is going to go, what things he is going to try.  Yesterday was no exception.

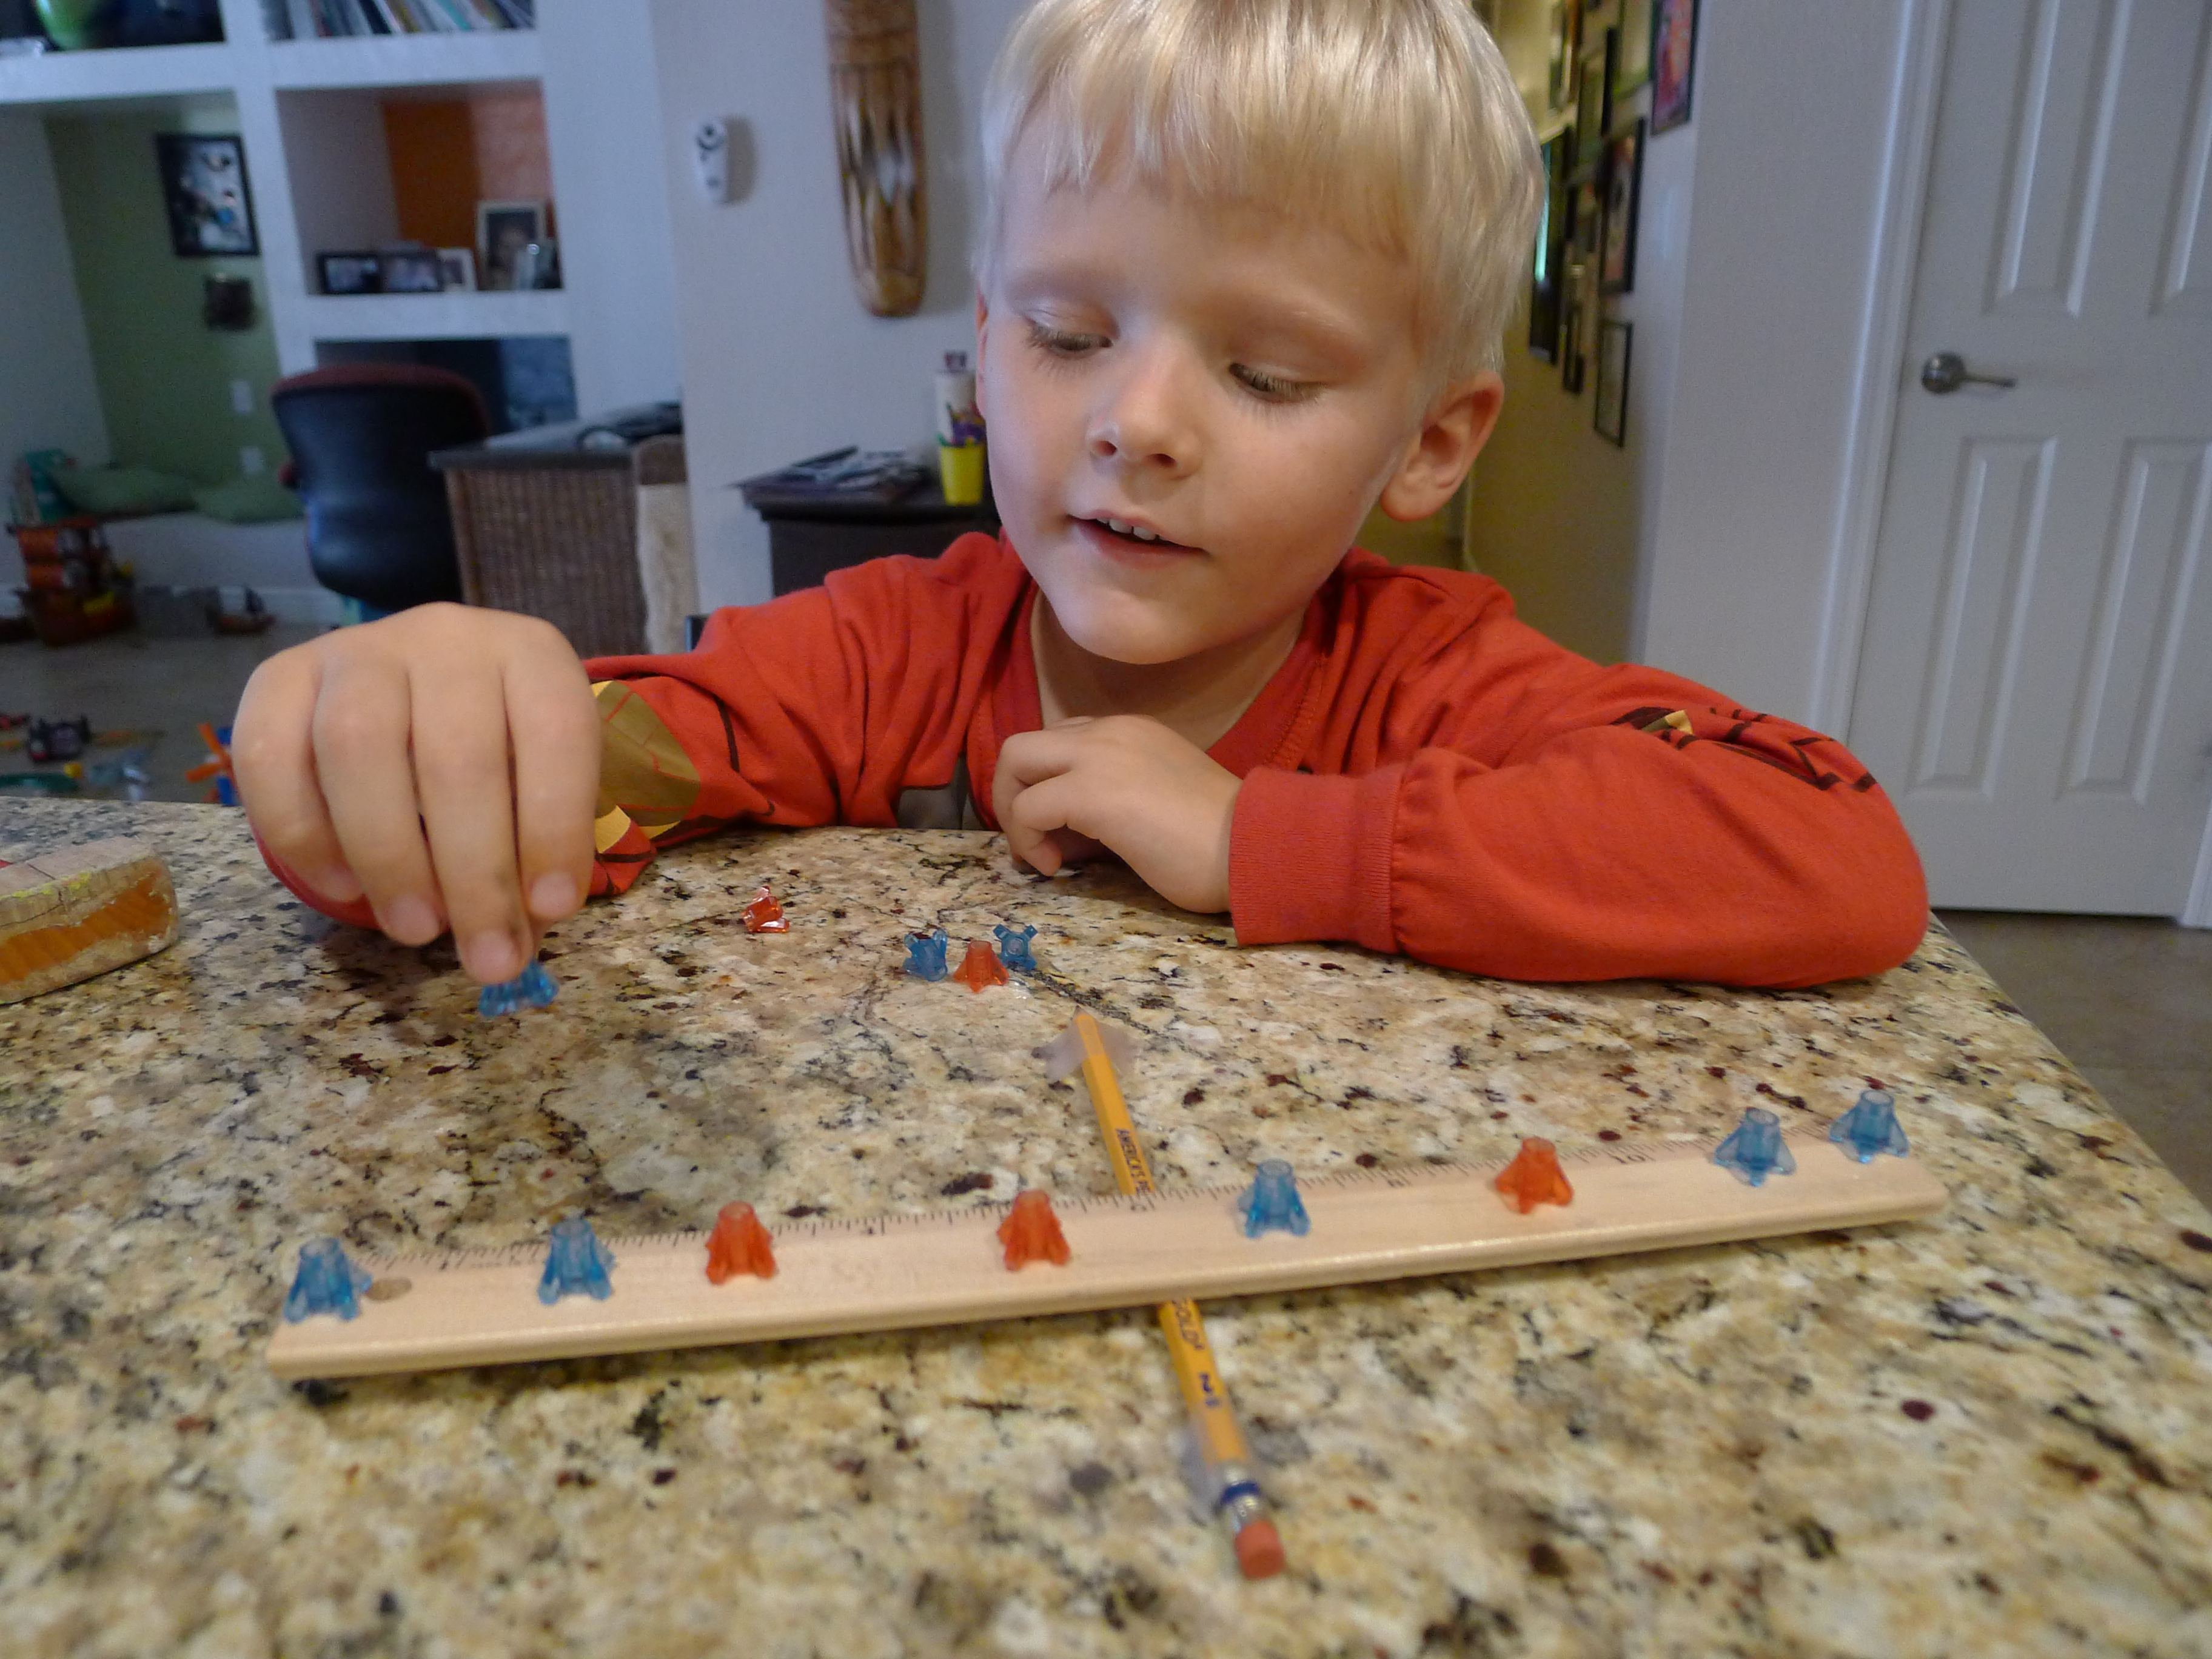
We started off by assembling a track for the Hot Wheels.  The track is the same orange track that has been around for the last twenty years.  It has a little launcher on one end, powered by stretching an interior rubber band.  We placed a car in the launcher, pushed the car back to stretch the band, then hit a button to release the tension and propel the car forward.  I have played with the track countless times with my own boys.  We test all the cars to see which will go the farthest, and then we are usually done.  We might build the track another way to see how that changes things, but it is always cars on the track.

Alex did this.  Then he looked at a Bingo set I had near by, complete with the metal rotating cage and plastic balls.  He said “I want to play with this now.”

Great, let’s play Bingo.  Instead, he took a ball out of the cage and placed it on the car launcher.  Instant gratification- the ball was significantly lighter, and shot across the room.

20150806_090749

“That went really far, Miss Kat.”

Yes, it did.  I began to worry that I might be cleaning up a lot of little balls off the floor, but after a few more launches, he grew tired of it.  Tried that, saw what happened, done.

We moved on to painting.  If there is one thing I’m sort of known for when it comes to kids, it’s that I’m not afraid to let them get messy.

I gave Alex a piece of poster board, a plastic pallet with around ten paint colors, a few containers of glitter, and a cup full of various sized brushes.

I have painted with a lot of children.  But Alex did things I have never seen a child do.  I have had children dip all kinds of things besides paint brushes into their pallets- fingers, puff balls, leaves, rocks, cars, candles, pencils.  But I have never had a child ask this question:

“Can I turn it over?”

I thought about it.  The mom in me thought oh, that’s going to be a mess.  The teacher in me thought YES!  The teacher won out.

Alex first tipped it sideways, and giggled.

“It’s dripping!”

20150806_11570320150806_115704

Then he tipped it completely over to see if he could increase the size or intensity of the drips.  We were both fascinated watching the paint stretch and fall onto the board.

20150806_115733

Next he placed the pallet directly on to the canvas, lifting it after a few seconds to see what the result was.

20150806_115743

He then began drumming on the pallet to see how much of the paint he could get out.

20150806_115859

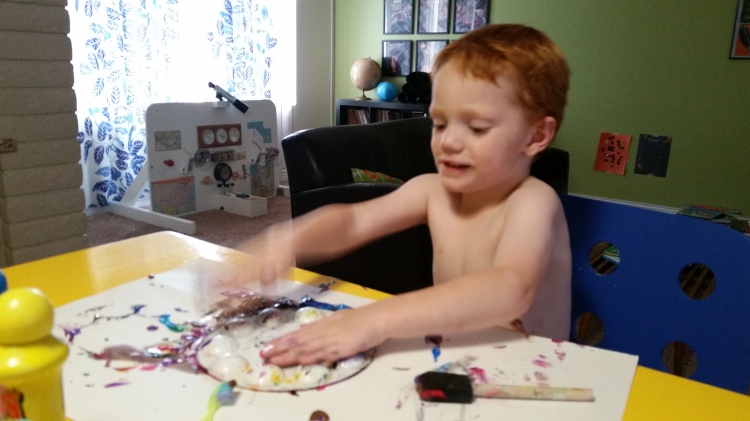
Feeling he had exhausted every possibility with the canvas, he moved on to the paint, running his fingers through the liquid and becoming delighted when it would squish through his hands.  20150806_115953

I asked him if he had ever written in paint, and used a stick to write his name in the liquid.  He quickly wiped the word away and laughed.  It became a game- i would write the name, he would erase it with a sweep of his hand.

Next, he wanted to try the sprinkles.  But it really had nothing to do with the look of the glitter.  He grabbed a glitter bottle in each hand and began to shake, moving his whole body in rhythm.  Every once in awhile he would stop to look at the mounting pile of glitter, but it really seemed to be more about the movement of shaking.

20150806_120319

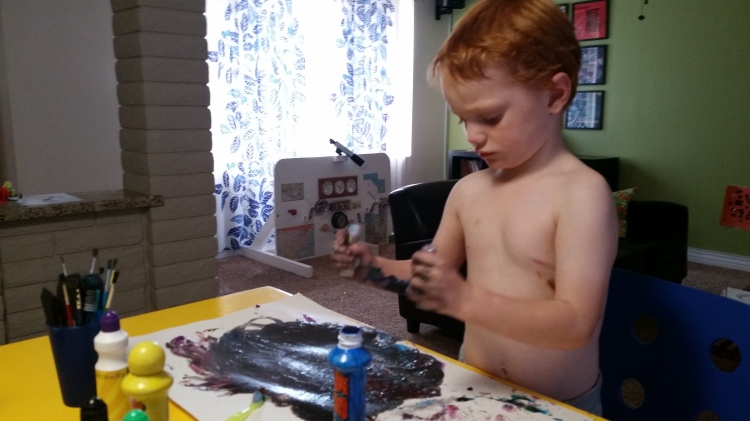
Last, he took about ten paint brushes in one hand, and began running them over the paint to create lines.

20150806_120645

The painting was a pretty standard piece of kid artwork, if you were simply looking at it and didn’t know the method behind the piece.  I didn’t come away thinking he’s the next Picasso. But I did think if he could hold on to that ability to think in new ways, he’s going to become a heck of a problem solver.

As we get older, experience teaches us to let go of that type of ingenuity.  We focus on the result- a mess that will have to be cleaned, materials that were used, an end product we may or may not be happy with.  But the joy and creativity taken from the method is lost.  Who cares if we have to spend ten minutes cleaning brushes?  So what if we got paint on a shirt?  Maybe the painting is nothing to frame, but wasn’t it fun just to wonder what will happen if I do this?

We can’t do it every day, with every experience.  Yes, we are adults.  We have to keep some kind of functioning order.  Sometimes duty and responsibility win out over creativity.  But that’s not always the case.  Give yourself permission to do something purely for the thrill of it, without thought of how it will pan out.  Let the paint fly!

20150806_120137

Painting the Bathtub Red, We’re Painting the Bathtub Red…

This is one of those ideas that will make you slap your forehead and exclaim “Why didn’t I think of that!”

Don’t worry, I didn’t think of it either.  All credit goes to my friend,  Dale.

I remember her telling me that she used to let her daughter paint in the bathtub.  I don’t know why it took me so long to try it.  It makes perfect sense for containing and cleaning up the mess of painting.

The boys had a case of Phoenix summer fever today- bored with being indoors, needing something new to do.  Dale’s idea popped in my head.

We started with Crayola Washable Kids Paint and a variety of brushes.

P1210727

P1210713

I had Kellen take off his clothes and climb in the tub.  I knew he would want to paint himself as well as the porcelain.  I imagine this could be a great way to tempt a reluctant child to take a bath.

P1210712

I gave him a couple of rules- keep the paint out of his hair (he hates getting shampooed) and only paint on the white of the tub.  Other than that, he had free reign.

Liam did not want to get in the tub, but wanted to paint from the outside.  This worked just fine. I thought it was cool that he was painting from a different vantage point than he normally does.

P1210720

For clean up, I simply ran a bath and gave Kellen a variety of scrub brushes and sponges.  We did have to run two baths- the first was colored with paint, the second was mostly clear.  After draining the second bath, the tub was clean!  I love that this is two activities in one, and that the child is responsible for his own clean up (even if it is fun).

P1210726

The boys were free to try different techniques, go crazy with paint, and not have to worry about a mom demanding “Be careful! Watch where your painting!”

Not the greatest way to create lasting artwork, but it certainly will create a lasting memory.  Paint the bathtub red! And yellow! maybe orange too…..

P1210723

Light and Dark- Crafts that Glow

In one short week, the school year will end.  For many kids, that means summer camp.  I teach science and art camps for children during school breaks, so I have been hard at work planning my summer session of Kat Camp.  This year the theme is “Light and Dark.”  I love that this theme can be concrete, like learning about how blocking light produces shadow.  But it can also be abstract, like drawing to music that might be termed light or dark.

I’ve been playing around with different ideas, and thought I would pass on a few, in case you want to explore your own Light and Dark theme at home.

1.  Plastic Cup Suncatchers

I saw this post that produced a gorgeous rainbow suncatcher from melted plastic cups.

http://mylifeinthenuthouse.blogspot.com/2011/06/rainbow-suncatcher.html

While the result is incredible, it is a bit more involved than I can do with a group of young children in a camp.  I decided to modify to a single strand.  If children want to produce more than one stand and put them together as a mobile at home, they would have that option.

I found plastic cups a the dollar store, but they were not the type 6 recycling plastic recommended in the post.  I gave them a shot anyway.

P1190052 P1190050

They did not produce the perfectly rounded bubble as seen in the original post, but I think they look really cool!  I love how the irregular shapes- to me they look like interesting glass.  I also layered the cups to get different colors- putting a blue cup over a green cup to get turquoise.  I felt bad throwing out the bottom of the cups, so instead, I melted those too.  I especially liked when I layered the bottom of two cups- it created a neat bubble effect.

P1190054

I attempted punching holes in the cups, but noticed that when these cups melted, the hole got covered.  Instead, I drilled holes after all the cups were melted.

On camp day, the kids will thread the pieces to make their suncatchers.  Easy, beautiful project- great for fine motor skills, and can be a vocabulary booster when you define words like transparent and illuminate.  If you do not like the look of the string, you could opt for fishing line.


P1190190 P1190186


2.  Glow lanterns

For camp, we are going to make glow in the dark bouncy balls.  You can find the recipe here:

http://www.growingajeweledrose.com/2013/05/play-recipes-homemade-bounce-balls.html

But I couldn’t wait to try out the glow in the dark paint, so Kellen and I made glow lanterns.

I saw this craft where the artist painted tiny dots of glow in the dark paint on a mason jar to create a starry lantern.

http://frompankawithlove.blogspot.com/2012/01/glowing-jar-project-varazslat-lakasban.html

Another beautiful project, but my four year old is not precise and dedicated enough to paint all those dots just yet.  We opted for another version.

We squirted the glow in the dark paint inside of plastic bottles so that it would run down and stripe the sides.  In my experience, children enjoy squeezing the paint more than just about any other aspect of the project- I think because it is generally something they are not allowed to do.  We also added some glitter paint and regular glitter to the mix.

P1190283


We sealed the bottle with cute tape, and then got to shaking up all the contents inside.

P1190288 P1190289


The finished project was super cute, and really glowed!

P1190293 P1190295


3.  Making Rainbows

No lesson on light and dark would be complete without making rainbows.  The class is going to do two experiments to learn how rainbows are made.

http://buggyandbuddy.com/science-for-kids-making-rainbow-reflections/

When I was a kid, I always wanted a prism because I thought they were so beautiful.  I really wanted to give each camper a rainbow maker to take home.  I contacted a friend who is a jewelry maker, and asked if she knew where I could get inexpensive, high quality crystals.  She directed me to a couple of websites for chandelier parts.

http://www.gspncrystals.com/CHANDELIERS/Productlist.aspx?Category=1027

http://www.spectrumhome3.com/spectrumhomeN/Productlist.aspx?Category=1027

I was able to get huge, high quality crystals that make tons of rainbows for about $0.70 each! This one is a bit covered in dust because we were already playing with  it, spinnning it on the ground. I can’t wait to give them to the kids!

20150513_080929


I’ve got more light and dark crafts for my campers, so be on the lookout for part two.  But hopefully these crafts will get you started on your exploration of light and dark.


DIY Building Sets- Big Fun, Small Cost

“I don’t know how you come up with this stuff.”

Over lunch with a friend, she commented on some activity I did with my children, seemingly astounded by my creativity.  I am going to let you in on a secret- I’m not so much creative as I am cheap.  I appreciated the compliment, but the truth is I just really hate to pay for something that I’m unsure will get used.  We all know what it feels like to spend your hard earned dollars on some sort of toy or gadget, thinking your kids are going to do back flips when they see it, only to have it tossed in the corner after five minutes of play.

I have been looking for a new building set.  My kids are Lego fanatics.  I paid for two sets of Magna-Tiles (an unheard splurge.)  But beyond that, we haven’t had much luck with building toys.  Tinker Toys were quickly forgotten.  Crystal climbers- not much interest.  Qubits- a big snore.  That set with the magnetic balls and rods- well, I just got annoyed with my floors getting covered in marbles.

Here are a few ideas to utilize your kids’ problem solving skills without breaking the bank.

1.  Pipes, pipe fittings, and zip ties- I have been on the lookout for a set of pipes for quite sometime.  If you have gone a children’s museum in recent years, chances are you have played with some sort of pipe building system.  I’ve seen them at the OMSI in Portland in Oregon, where you try to build a water way.  In Mesa, AZ, at the Natural History Museum, you build them to get a ping pong ball into the mouth of a baby pteradactyl.  I looked into buying a set of play pipes from Lakeshore but didn’t want to pay $25 for a small set, when I didn’t now if my kids would like it and/or need multiple sets to build things they really enjoyed.

http://www.lakeshorelearning.com/product/productDet.jsp?productItemID=1%2C689%2C949%2C371%2C925%2C194&ASSORTMENT%3C%3East_id=1408474395181113&bmUID=1430094329461

I found a huge box of white PVC pipes and fittings at a thrift store for $10.  My husband had zip ties in the garage.  We were ready to go!  I gave the kids instructions to build a lawn waterer that had to reach from our pool fence to the grass. I had to assist them a bit, but I was very impressed with their engineering.  At one point, I put a fitting on the a pipe, my four year old looked at it and said “that’s not going to work.”  He was right- I had lined up the pipe with a fitting that was blocked instead of hallow.


I can’t wait to see what we build next with these.

2.  Card stock and tape- I perform the most simple volunteering task in the world by cutting out things for Kellen’s preschool class.  The teacher tucks the sheets in his backpack, I cut them out and return them.  I cut out something on neon card stock that left a huge amount of scrap.  I couldn’t stand to throw all that good material away!  I cut it up to save for another day.

This past week, I cut the card stock into squares, and taped them into triangles and cubes.  Liam noticed what I was doing, and started to tape shapes of his own.  I asked if he could build with the shapes.  He started to put them together, but the shapes were flimsy.  I asked him what he could do to accommodate for the flexibility.  He began stacking them to provide support, and taping them together to make them extra sturdy.  Great opportunity to problem solve, and every item was on hand.

P1180961 P1180952 P1180958

3.  Bottles and boxes- I know this is going to seem like a “duh” moment.  Of course you can build with bottles and boxes.  But I think most of us find it annoying to save those materials that should be in the recycling bin (I know my husband does.)  They are worth saving! Sure, you could buy a set of cardboard blocks for $25-40, but it costs a lot less to use what you have on hand.

http://www.amazon.com/Melissa-Doug-Deluxe-Cardboard-Blocks/dp/B000A12YBW

My children have gotten VERY into the Wild Kratts games on pbskids.org.  I try to capitolize on their interest by creating activities that incorporate the Wild Kratts but get them off the computer.  One of the games involves a rhino charging and knocking through tree stumps and rocks.  I decided to help them create our own obstacles to charge through.

We stacked empty boxes and plastic bottles to create trees and rocks to charge through.  After each charge, I asked them if they could build the next obstacle higher than the last one.  The activity was a perfect combination of problem solving and physical play.

P1180994 P1180989 P1180988 P1180982

Ok, maybe I’m a garbage hoarder.  I’ve been called worse.  But why spend your money on expensive building sets when you can make them at home.  That’s cutting into your wine budget, and nobody wants that.